
Showing posts with label recipe. Show all posts

Wednesday, December 22, 2010

Cookie Exchange

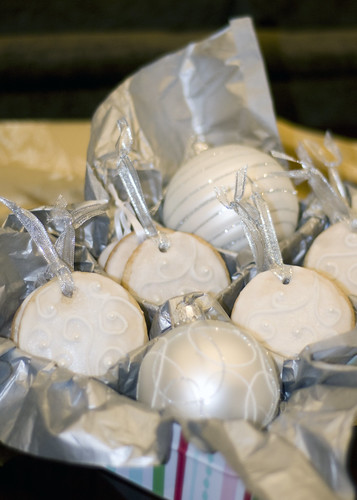
This year's Mom to Mom cookie exchange was a couple weeks ago but I'm just now able to post my pictures and recipe. My cookies took the prize for best lookin' cookie! I loved what my friend Stephanie did with her Haystack cookies. She used them for the hay in the manger by putting Nativity scene figures around them and Baby Jesus on top. Really clever...which is why she won for best presentation!

cookie 01

cookie02

Ulimate Sugar Cookies

1 cup White sugar
1/2 cup butter (room temp)
1/2 cup shortening
2 eggs
1/4 cup light corn syrup
1 Tablespoon vanilla extract
3 cups flour
3/4 teaspoon bakingpowder
1/2 teaspoon baking soda
1/2 teaspoon cinnamon
1/2 teaspoon salt

Preheat 375 degrees.Mix flour, baking powder, baking soda, cinnamon, and salt in a medium bowl. set aside. In a large bowl beat butter, sugar and shortening until well blended. Add combined dry ingredients and mix. Separate dough into several balls, roll out and cut into shapes. Place shapes on cookie sheet and bake for 5-9 minutes.


Icing:

2 cups sifted confectioners' sugar (sifted after measuring)
1 tablespoon low-fat milk (skim or 1% is fine although I have made this successfully using 2% fat milk)
1 tablespoon corn syrup (more if needed to reach desired consistency)
1/2 teaspoon almond extract
1/4 teaspoon vanilla
food coloring (use colors of choice)
Change Measurements: US Metric

1 VERY IMPORTANT; the confectioners sugar must be sifted before using. 2 In a bowl beat the sifted confectioners sugar with milk until smooth. 3 Beat in corn syrup and almond extract until smooth and glossy (if icing is too thick add in a small amount of corn syrup). 4 Divide into as many separate bowls as desired. 5 Add in different food coloring to each bowl beating/whisking until the intensity is achieved. 6 Paint the icing over the cookies using a brush or dip the cookie edges into icing (this will set quite quickly). 7 Place cookies on waxed paper to dry.

Thursday, April 2, 2009

Hamburgers? a gluten-free alternative...

With allergies, comes a few sacrifices. . . like hamburger buns. My boys are pretty content with their bunless hamburger patties, but I have noticed that if I give them 2 patties and a side veggie, they will use the patties as buns and the veggies as filler to make a "sandwich." These guys just want their food to look like everyone else's.

With the new allergy results I might be able to figure out or find a recipe that I can make or adjust to work, but for now this looks pretty darn good! I used Polenta (in the roll--if you haven't tried this stuff, you should!) I cut the rounded ends off for the top "buns" and sliced the rest for the other bottom buns and extras. Just heated it on a skillet and put a hambuger patty between and it looks like a "real hamburger."


Corn (the main ingredient in polenta) is a common food allergen, but fortunately my boys are able to eat it.

We had to show Barrett how to pick up and bite into a hamburger-a whole new concept for him!

Thursday, February 19, 2009

Cilantro Chicken Soup for your Cold Toes

We've all been enjoying this soup this winter. Thought I'd share this recipe because everytime I make it, I get glowing reviews from everyone. I like to make it because it means I don't have to make a separate allergy-free meal for the boys. This recipe contains no wheat, soy, dairy, rice, nuts.

Cilantro chicken and white bean soup

2 15 oz cans great northern beans, drained
4 cups chicken broth
1 tbsp grapeseed oil
1/4 cup chopped green onion
1 yellow bell pepper, chopped
2 cloves garlic, minced (or 1 Tbsp chopped)
1 4 oz can chopped green chiles
1 teaspoon cumin
½ teaspoon cayenne powder
5 cups diced or shredded chicken (cooked)
½ cup fresh chopped cilantro
Salt and pepper to taste

Using a blender, blend one drained can of white beans with 1 cup chicken both until smooth.
In a large pot, saute onions, peppers, and garlic in grapeseed oil over medium heat. Add chiles when the onions become transparent.
Add the remaining chicken broth and the rest of the ingredients to the pot except for the beans. Cover and allow to simmer for at least 20 minutes.
Add the blended beans and the whole white beans to the soup and simmer for 15 more minutes.
OPTIONAL: Garnish with monterrey jack and additional green onions

Wednesday, December 3, 2008

Cookie Exchange

My Mom to Mom group had a cookie exchange yesterday. It was great. We all made 6 dozen home made cookies to display and trade for the yummies that others brought.

There were rules and prizes and my Snowballs won for Most Unique! The other winners were Kori's Sugar Cookies for Best Lookin' and Stephanie's Thumbprints for Neatest Presentation. She had her kids paint their thumbprints on the bags that held the cookies. The thumbprints were shaped to make wreaths and Christmas trees--so cute! There were so many great cookies and candies and now we're all set for the holidays! We MUST do this every year from now on! Oh, and we're going to make a book with all the recipes, too. love.it.


Here's the Snowball Recipe


Ingredients

1 box red velvet cake mix (I made some with a yellow cake mix, cook as directed on box for 13x9 cake)

1 can cream cheese frosting (16 oz.)

1 package White Chocolate bark

wax paper--Do not use cooling rack

flake shredded coconut


Directions

1. After cake is cooked and cooled completely, crumble into large bowl.

2. Mix thoroughly with 1 can cream cheese frosting. (It may be easier to use fingers to mix together, but be warned it will get messy.)

3. Roll mixture into ping pong size balls and lay on cookie sheet. (Should make 45-50. )

4. Chill for several hours. (You can speed this up by putting in the freezer.--note:I found that the frozen balls did much better for dipping)

5. Melt chocolate in microwave per directions on package in small amounts.

6. Roll balls in chocolate and lay on wax paper until firm. (Use a spoon to dip and roll in chocolate and then tap off extra.)

7. Quickly top with coconut before the chocolate cools and hardens

Thursday, July 31, 2008

This.is.the.life...these.are.the.moments.

It’s these moments. right here. right now. It’s the everyday at the dinner table, in the bathtub, climbing naked up the stairs, giggling down the hall, getting tucked in bed and hearing *their* bedtime stories. That’s the stuff I want to bottle up in a Mason jar and preserve forever. These are also the things we so often take for granted because they happen everyday.

But, right now, Barrett always wants to wear this broken pair of baby sunglasses when he brushes his teeth. This crazy quirk is fleeting (I think, I hope—I know of almost no one who does this sort of thing in adulthood—and if they do it isn’t cute anymore). I need to slow down and enjoy this phase while it lasts. While I was on the phone with a client tonight, Bear came dancing through the house (naked) singing,”Shake your hips!” Sluurp! (that’s the sound of me soaking it up - this crazy, wonderful life…Ahh...This.is.the.life.

For dinner tonight, I made a meatloaf that I have made before with much success. Kyle gobbled his up so fast. People who see me feed him cannot believe how much he eats. They always say “Is he going to eat all that? That would feed my child (who is twice as big) for a week!”

This is an allergy recipe the whole family will enjoy even those without allergies! I created this recipe as a treat for my kids, but it turned out we all love it! Fritos are a special treat for the boys. They rarely get to eat chips so they get excited to see Fritos going in here. I am happy knowing that Fritos are nothing but corn and corn oil.

Kiss Your Mama, This is Good Meatloaf! Recipe
Contains no gluten, dairy, soy, nuts, rice, oats, barley, eggs

2 lbs ground beef
1 cup Fritos crumbs
1 cup Fritos, slightly broken
½ large white onion, chopped
½ cup chopped green bell pepper (you could substitute ½ cup pureed carrots if your kids will balk at the green bell peppers)
2 cloves garlic
½ TBSP salt
1 tsp pepper
½ TBSP dried cilantro (optional)


The kids will love to help crush the Fritos. Put them (the Fritos, not the kids) in a sturdy baggie, removing all the air and let them squeeze.
Preheat oven to 350 degrees. Use your hands to mix all of the ingredients in a large mixing bowl. Form the mixture into a loaf shape and…
My best meatlof tip is this: Use 3 slices of bread on bottom of a 9x13 cake pan (not a loaf pan) to soak up excess juice and grease. For my kids (wheat intolerant) I slice off the thin layer of meatloaf that touches the bread after it has cooked.
Bake at 350 for 1 hour.

A sauce for the Mamas and the Papas or anyone who can tolerate it (not allergic)
So Easy!
Take a jar of your favorite Salsa—my fave for this is Herdez Medium.
Pour the whole thing into your skillet and simmer. You are just looking for it to thicken up and lose it’s watery-ness. I add just a little salt, but you don’t have to. It will take about 5 minutes. Pour this over your meatloaf and enjoy!

Monday, July 28, 2008

ode to blueberry pancakes


If you cannot see a slideshow Click Here


It has been mentioned once or twice before on this blog about the boys' love for pancakes. I love that even with all their allergies, they can enjoy this favorite. In the slideshow, they are eating pancakes made with buckwheat flour which is surprisingly gluten-free! Also, I feel I need to say the reason they are dressed (or not dressed as it is) is because these pancakes are usually very messy. I think it's funny how Kyle's bites are so big his eyes close so his mouth can open wider. Man, I'm a lucky mom to have two such wonderful little boys.

I like in the slideshow how immediately after I tell them not to touch the pancakes they grab them. What did I expect, really?


Allergy Friendly Pancakes Recipe
This recipe has no gluten, casein, wheat, oats, rye, barley, corn, soy, or nuts.


2 c. buckwheat flour (or flour of the day)

1 c. tapioca flour

5 t. corn-free baking powder

1 t. salt

4 T. sweetener of choice

2 “flax eggs” (=2 TBSP flax seed meal + 6 TBSP water microwaved for 1 minute in separate bowl)

6 T. oil of the day

1 t. vanilla

2 cups milk of the day (or water + 1 TBSP ghee)

2 ripe bananas mashed, or 1 jar Gerber pears (if allowed for the day)

½ cup frozen or fresh blueberries (optional)

Pour batter onto griddle or hot skillet greased with ghee or oil of the day. Flip when bubbles appear all over. (I actually use an ungreased hard-anodized non-stick pan--No Coating that scratches off--have you seen these?!?)

notes:
Add cinnamon, or blueberries, or banana “wheels”, or pumpkin and pumpkin pie spice for variations.


Monday, December 31, 2007

a little something for Santa


On Christmas Eve, we made cookies! This is definitely the beginning of a new tradition. Actually, in an Aggie home, if you do something once, it's already a tradition.
Here's my dairy-free recipe for the sandwich cookies:

Chocolate and Peppermint Marshmallow Sandwiches

1 cup flour
½ c unsweetened cocoa powder
½ teaspoon salt
4 oz. unsweetened baker’s chocolate, chopped
1 cup butter substitute, (smart balance light)
1 teaspoon vanilla extract
2 eggs
½ c red and white sprinkles
1 recipe peppermint marshmallow filling (below)

1. Heat oven to 325. Line baking sheet with parchment paper. In a medium bowl, wisk flour, cocoa, baking soda, and salt. Set aside.
2. In a medium saucepan over low to medium heat, melt butter and baker’s chocolate. Remove from heat and let stand until cool (approx 20 min)
3. Stir in sugar, vanilla extract and eggs to the chocolate mixture until combined. Slowly add the flour mixture until a dough forms.
4. Form a large dough ball, wrap in plastic and refrigerate for about 20 minutes.
TIP: You could also split the dough into 2 or 3 dough balls and freeze the extras for later—great for getting that variety we need without wasting food!
5. When dough is firm, form into 1” balls. Dip the tops of half the cookies into sprinkles and place on ungreased baking sheet 2 inches apart. Bake at 325 for 10-13 minutes. Allow to cool fully before adding the marshmallow filling (see next recipe).


Peppermint Filling
1 pkg unflavored gelatin
½ c cold water
1/3 cup cold water
1 cup sugar
¼ teaspoon vanilla extract
½ teaspoon peppermint extract
a few drops of red food coloring (optional)

1. In mixing bowl of stand mixer, mix together gelatin and 1/2 cup water and let stand 5 minutes.
2. In a small saucepan, mix 1/3 cup cold water and sugar and heat to 238 degrees, measuring with a candy thermometer. (appx 10 minutes)
3. Add sugar mixture to gelatin and beat on low with wisk attachment for 5 minutes. Add vanilla extract, peppermint extract, and food coloring on medium-high for 12 more minutes.
Related Posts with Thumbnails